
Linux/Ubuntu からメールを送信する ssmtp のインストールと設定に関する覚え書きです。
インストール
公式リポジトリから ssmtp をインストールします。
$ sudo apt update
$ sudo apt -y upgrade
$ sudo apt install ssmtp
設定
myaddress@gmail.com を送信元のアドレスとして /etc/ssmtp/ssmtp.conf の設定を変更します。
$ sudo vim /etc/ssmtp/ssmtp.conf
#
# Config file for sSMTP sendmail
#
# The person who gets all mail for userids < 1000
# Make this empty to disable rewriting.
#root=postmaster
root=myaddress@gmail.com

# The place where the mail goes. The actual machine name is required no
# MX records are consulted. Commonly mailhosts are named mail.domain.com
#mailhub=mail
mailhub=smtp.gmail.com:587

AuthUser=myaddress@gmail.com
AuthPass=***
UseTLS=YES
UseSTARTTLS=YES

# Where will the mail seem to come from?
#rewriteDomain=
rewriteDomain=gmail.com

# The full hostname
#hostname=
hostname=MyServer

# Are users allowed to set their own From: address?
# YES - Allow the user to specify their own From: address
# NO - Use the system generated From: address
#FromLineOverride=YES
FromLineOverride=YES
Googleアカウントに2段階認証を設定している場合はアプリパスワードで作成したパスワードを AuthPass に与えます。
メールのテスト
実際に変更した設定が適切に処理されているか recipient@gmail.com にメールを送信して確認します。
まずテキストファイルにテスト用のメールを新規に作成します。
$ vim testmail.txt
testmail.txt
To: recipient@gmail.com
From: myaddress@gmail.com
Subject: ssmtp test

Test message from Linux server using ssmtp.
ssmtp または sendmail で作成したテストメールを送信します。
$ ssmtp recipient@gmail.com < testmail.txt
# or
$ sendmail -t < testmail.txt
echo とパイプを使ってメールを送ることもできます。
$ {
echo To: myaddress@gmail.com
echo From: myaddress@gmail.com
echo Subject: ssmtp test
echo
echo Test message from Linux server using ssmtp.

} | ssmtp myaddress@gmail.com
宛先に指定した gmail アカウントを確認してみます。
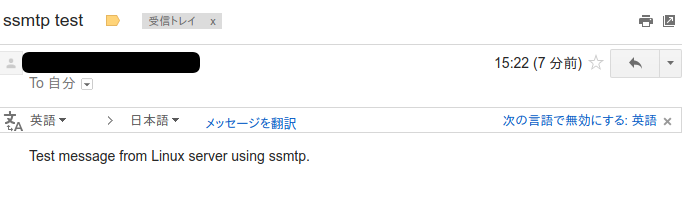
ssmtp で送信したメールを gmail で受信できました。
参考リンク
EmailAlerts - Community Help Wiki


【Linux/Ubuntu】ssmtpのインストールと設定